A $2 Auction Tree
At the August GNOBS Annual Auction in 2014, I happened to notice a Chinese elm in a rather large 15 gallon nursery pot. It stood about 5 feet tall in the pot and had never been worked as a bonsai. It was just a large nursery tree, with no branches until about three feet up the trunk. It had a decent sized diameter trunk, but more importantly, it had great radial roots. I thought it would make a great broom-style bonsai. And I liked the size of the trunk as it was, so the” growth-for-size” stage had already been done.
Because it was not a bonsai, or even a tree that had been cut back to one day become a bonsai, it was not brought up to the auction block until the very end. I suppose no one wanted it because it was just a large nursery tree, or maybe because it wouldn’t fit in a car, but to me… it had potential. So my $2 bid was quickly accepted.
I did not do anything for the rest of 2014 except keep it watered and happy. In late January of 2015, the “growth-for-design” stage began and I cut the trunk back to a height of 10 inches above the nebari. At that time, the tree was about 3 ½” in diameter above the nebari. Sadly, and amid the many reprimands of my wife, I took no pictures of the tree when I bought it or of the initial “stumping” of the tree. It is all too typical of me. I get enthused about working on a tree and never give a thought to documenting the process. (I promise to work on it in the future.)
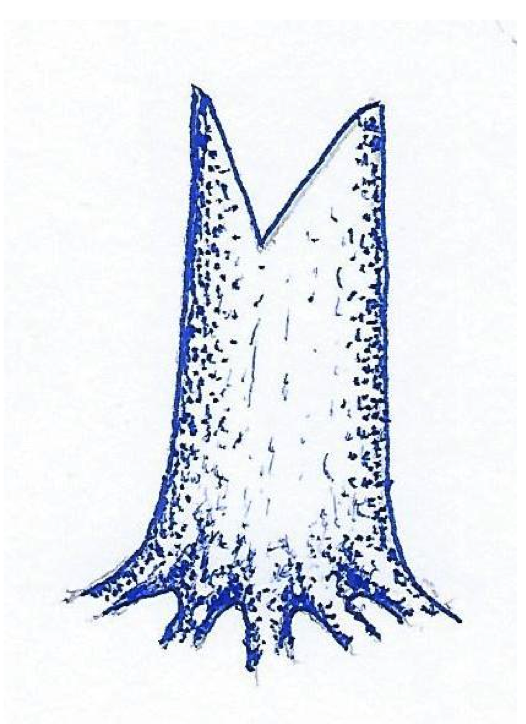
After setting the cut height, I sawed a “V” notch in the trunk, making one side smaller than the other, as see in the drawing below. Each side of the “V” would eventually form a trunk. This put the height of the main trunk at about 7” before dividing into two trunk lines. The cut area was sealed with cut paste. When buds began to appear in February, I rubbed off all but two; one at the apex on each side of the “V” notch that was cut.
I left the tree in the nursery container and began lightly fertilizing after the two new shoots were a few inches long and the danger of any freeze had passed. I allowed the shoots to grow unchecked and allowed secondary shoots to form several inches above where they had emerged from the trunk. The secondary shoots only served to help thicken each side of the two trunks.
They grew all year and reached a height of about 4 feet. In early February of 2016, I pruned the two trunks back to about 3 inches from where they had sprouted. The callous tissue had begun to roll over nicely into the “V” cut, to begin healing the wound. I allowed the tree to grow with minimal pruning, removing only those shoots that were growing downward and pruning back the tips of branches that were growing too thick. I also did not allow any of the buds to remain that popped on the single main trunk. In late June of 2016, I again pruned away shoots and branches that were not contributing to the design of a broom-style bonsai and wired a few branches that I considered to be critical in the design to achieve proper directional growth.
By September of 2016, it was necessary to remove the wire. In January of 2017, I pruned the tree, removing unwanted branches and did minimal wiring. I continued to fertilize and keep the tree healthy. I pruned shoots that grew excessively long to keep the growth and development in balance. The larger of the two trunks was more vigorous and needed more restraining, while the smaller trunk was allowed to grow more freely.
In January of 2018, I pruned away unwanted branches and removed the tree from the nursery pot, did a severe root pruning and potted the tree into an oval, cream-glazed bonsai container. I used out typical bonsai 50/50 mix for deciduous trees. The bonsai container measured 24 inches across and 5 inches deep. I allowed the tree to grow unchecked for the entire 2018 growing season, since the tree needed to recover its strength after such a severe root-pruning.
In early February of 2019, I decided to prune and wire the tree completely. The photo below shows the trees’ appearance before the work began. It still had not lost all its leaves, but they were removed before work began. At this time, the diameter of the trunk is almost 6” above the nebari. This begins the “growth-for-refinement” stage.
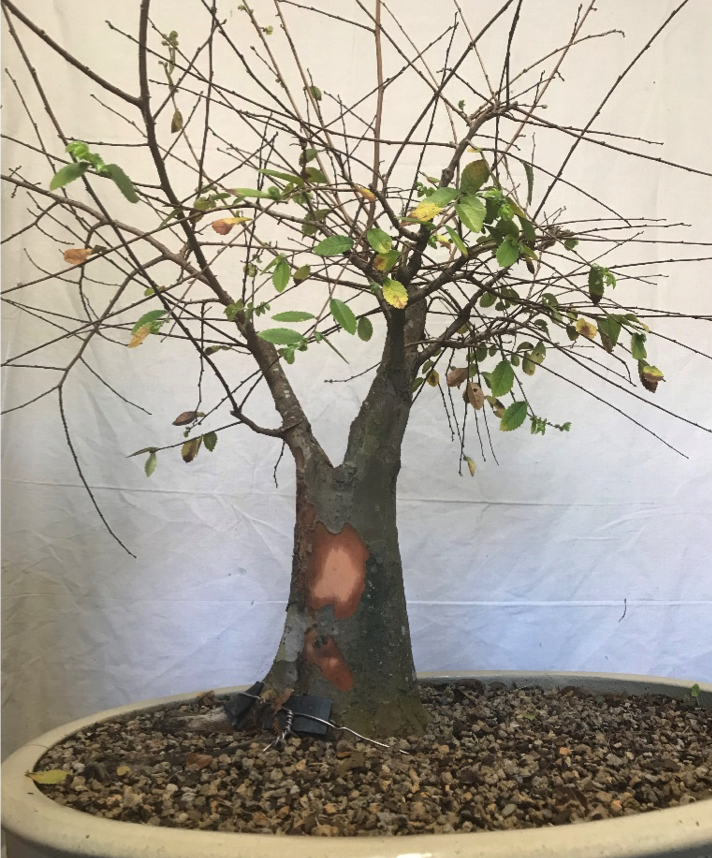
I decided to wire every branch, even though they will most certainly have to be removed only weeks after it leafs out. Some of the secondary branches were growing at 90 degree angles from the main branches. Others were growing at a 45 and everything in between. I wanted to achieve more acute and consistent angles throughout the tree; something more like 25 to 30 degree angles.
The branches were thinned out and appropriate intermodal spacing was created by removing branches near the origins of secondary and tertiary branches. As branches were wired, they were moved to create a balance by filling in unwanted negative space and creating negative space that was deemed desirable in the design. Many of the dominant branches were shortened, while leaving weaker branches long to gain strength. In late September, growth hormones called “auxins” concentrate at the tips of branches. By pruning away the tips of strong branches, you stimulate auxins further down the shoots, causing back-budding to occur. By leaving weaker shoot-tips alone, you are allowing them to gain in vigor and begin to balance the energy among the shoots. The goal at this point is to begin equalizing the size and strength of each branch.
The photo below shows the tree after pruning and wiring was completed. During the current 2019 growing season, the tips of the branches forming the outer outline will be pinched and pruned to encourage back-budding and the development of greater branching in the interior of the tree.
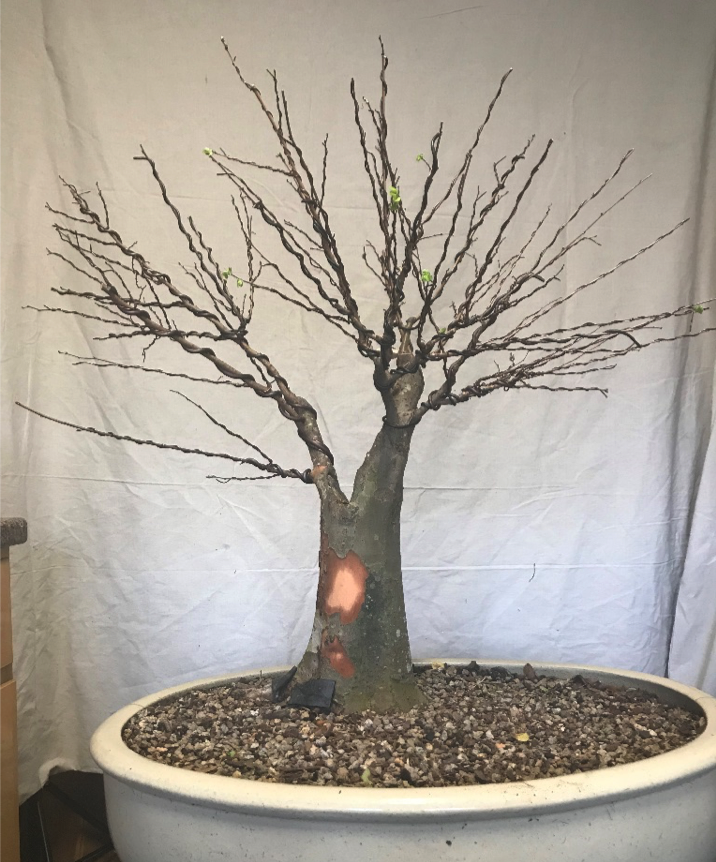
The tree will be cut back rather hard in September, eliminating the long shoots and using secondary shoots from the 2019 growing season to become the new apices and begin achieving better taper and a more dense branch structure. The current canopy outline will be taken back to about half of what it is currently.
If success is achieved this year in balancing the vigor of new growth, the tree will be allowed to grow more freely next growing season. Balance of the vigor will be the focus each year and cutting back each year to develop greater density and ramification of branches. The ultimate canopy will be a little larger than the current outline. This should take about 4 to 5 more years.
However, the main reason for writing this article is illustrate what can be done with inexpensive material that no one else wants, as long as you have the vision of what a piece of material can be. You have to develop an eye for future design and look for at least one unique or important element that can be utilized in your creation.